So, last year, around this very time, I was making an awesome prop for the Race for the Rune-carved Key event at Game Theory. Steve wanted me to use my skills to make a life-sized replica of the key we would be chasing down for the game. The descriptor text is:
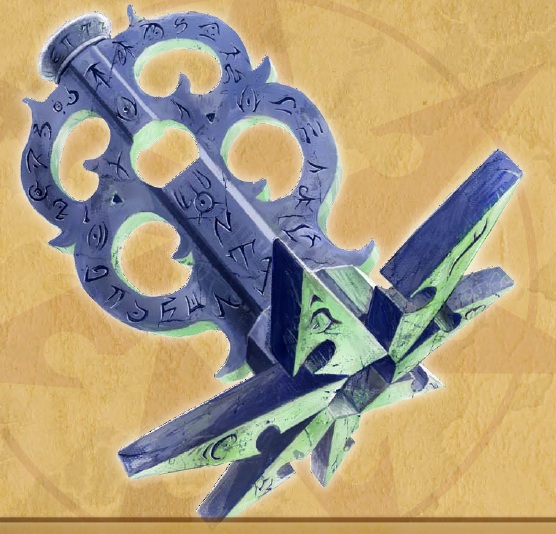
It stands roughly 3 feet tall when set on its Sihedron-shaped base, and is made of stone etched with glowing arcane symbols
And here is the picture from within the module:
Now, I have made many a stone prop before so I pulled out some of the tricks I’ve figured out through (mostly) reading and trial. Several years ago I made tombstones for Halloween decorations and used blue foam insulation from the hardware store. I’ve also used this blue foam to make walls and props for various plays and haunted houses I’ve done through Applause. It’s relatively cheap (you can get at least 3 tombstones from one sheet) and it’s super light-weight- which is a major plus when making a 3x3x3 foot prop.
Some places sell the foam in thicker, pink sheets but my Lowe’s doesn’t have that . The blue insulation is 1 inch thick so I had to glue layers together (with wood glue) to get the correct thickness in some places (even then I wish I had made the spikes thicker). I free handed out the handle portion onto the foam and cut it out with a box cutter. I wasn’t too worried about jaggy edges because this was supposed to be an ancient relic. I filled large cracks, like the ones created from gluing the layers together, with joint compound. Another good propriety of the foam is it’s sandable so I was able to round off the edges a bit. For the center part where the spikes radiate from, I built a 7-sided cardboard box. This part really needed to be sturdier than what I made it because the cardboard I used peeled off in layers when too much pressure was applied to the attached bits. Next time I will know better but I’m still not sure what I would do differently.
Here are some in progress pictures:


You may notice at the top of the key’s handle there is a plastic container. I didn’t want to figure out how to make the top portion of the handle using foam or cardboard. My cutting tools for the foam weren’t sophisticated enough to get a reliable taper and I hate figuring out how to curve a pattern to make a tapered cone on paper. I was racking my brain trying to think of how to make the cap and it hit me that the container from the ricotta cheese I had just made dinner with was the perfect shape. So I cut it down, put it on top and filled the void with modeling clay (model magic air-dry clay) and voila! Good enough.
I’m no good at taking progress pictures when I’m excited to work on a project, so the next few pictures are after painting. The steps for painting were: paint recessed/carved areas black, mix joint compound and gray paint to make “monster mud” which is painted on, use lighter grays to stipple and dry brush edges. Done.


At the event, there was a “winning” table the did the “most” to get to the rune-carved key (it was a year ago, so details are a little foggy). It just so happened that I was in that group. Here we are with the key.


The key now resides at Game Theory in Raleigh.

